Showing posts with label DIY. Show all posts

Friday, May 31, 2013

DIY: Burlap and Lace Rustic Wedding Vase

Phew! It's been awhile but I'm back. I've been haunted by the desire to get back to writing and most importantly creating new pieces for the last phew months.
Now that my family is finally settled into our new beautiful home here in Atlanta I have finally been able to start creating and start a few article concepts.

I've been focusing a lot on honing in on my niche. Who am I designing and writing for? How do I fit into her lifestyle? I now have a much better grasp on my customer and I'm really excited to show you what I've made for her.

Meanwhile, with the loss of so much of our stuff in hurricane Superstorm Sandy it became hard to recognise what we still had and what we need to pick up. For Mother's Day my dear sweet hubby gave me two dozen roses and I realized that we no longer owned a flower vase. At firsts I used the plastic pitcher but then I spotted a milk carton in the recycle bin and got this idea for a cute and quick vase that can be used for center pieces and other table decor.


                                                      This is what you will need:                                                                                          
Cardboard milk carton
Burlap
Scissors
Glue gun
Lace
Other decorations and doodads

1. Neatly cut the top off your carton. Measure your burlap by lining up the top edge of the carton with the clean edge of your burlap and wrapping it around your carton. Add about a half inch to the length to be safe and cut. Make your length cut by measuring the length of your carton and adding two inches.

2. Because burlap has so many spaces, only hot glue horizontal lines at the far sides near the corners to reduce glue exposure. Start with just one line of glue and press your burlap on the carton making sure everything is lined up correctly. Wait till your first line is dry before you move on to be sure that nothing shifts while you rotate the carton to the next side. Once you put down the glue pull the burlap tight with one hand and flip over the carton with the other pressing down for 10 seconds. Do this with all four sides.


Tip: I was able to get rid of the exposed glue by rubbing the hot edge of the gun nozzle along the edged of the carton.


3. Cut flaps on all four corners of the bottom of the burlap.


4. Glue the bottom flaps down, doing the opposites side first (as seen here).


5. Fill in any gaps that may appear at the top of the carton with glue and smooth burlap to the sides.


6. Add lace or any other decorative pieces that suite your event.
Tip: Because lace has even less space to glue down, I glued into the small circles that are in the middle of the pattern and placed small pearl embellishments over them to cover the exposed glue.


Well I hope you like my first official DIY. There will be many more to come. Please let me know if you have any questions or need any clarification for any of the steps. I'm glad to help!


Monday, November 19, 2012

Free Manzanita Tree and Shells

When I first thought about writing this entry I had yet to see the damage that was done to our home by Hurricane Sandy. It's hard to find a silver lining for the fact that I am officially "displaced" due to 3 feet of water that flowed throughout my entire house. Now that I am settled in my parents home in Boston, I can see the extent of the damage in the New York area from a distance of sorts and am deeply affected by the families who are without power during this winter season.
 I sat on finishing this post due to the fact that there are so many devastated families and neighborhoods on the northeast coast. In some ways it would be insensitive to write about collecting twigs for a wedding that at this point is probably canceled due to the fact that many venues, let alone homes are ruined. But being as that I'm obsessed with DIY and helping others save money during these trying times I wanted to share an idea I had while watching for falling branches during my first coffee run after the Super Storm Sandy. Brides-to-be in the northeast who desire a wishing tree for their special day and are still able to celebrate their nuptuals should try to salvage large sections of the fallen trees in their neighborhood. Start looking for long wide tree branches or saw some off of larger sections. In my opinion I wouldn't worry about stripping the bark off. Instead I would sand down any particularly rough patches and just paint the whole thing for a clean consistent look. Try to look for branches that have the most width, which will make for the most drama.


Here is a great Manzanita DIY from Wedding Chicks which also includes a free wish card template made especially for card stock. You can also checkout my previous Manzanita post to get some centerpiece and decor ideas.

Martha Stewart Weddings
Those of you who live near beaches can also take advantage of the seashells and driftwood that has been cast ashore from the storm. Above is an image from Martha Stewart Weddings site. They painted a branch from a Manzanita tree to give a beautiful coral effect. With a smaller piece like this it would be much easier to strip the bark of any type of wood to attain this smooth look.

Do you have any creative twig ideas? Share them with us!

Friday, September 28, 2012

Cheap & Chic: Babies Breath

I once read a quote that said something along the lines of "If I spent as much time finding a mate as I do planning my wedding on Pintrest then I'd be married by now". With constant images of lavish weddings like the Kardashians and the millions of images on Pintrest its hard to not desire a million dollar wedding. This is why Babies Breath is one of my favorite flowers. It covers a lot of space, is very inexpensive, has a clean almost whimsical look  and is very easy to maintain. I did a bit of research and found that the wholesale site Whole Blossoms offers the best price by bunch. 10 bunches of 6 stems is $99.99 with free shipping.


Babies Breath or Gypsophilia as it is technically called has three different types of styles:
Million Star


There is the "Million Star"variety which is used most often for bouquets and garland because of its small clusters that have the appearance of star clusters.


New Love


"New Love" has the same clusters as its sister but the flowers are a bit larger and it has a longer vase life. 


All images from Fifty Flowers


I couldn't figure out what exactly is the difference between this "Party Time" variety and the rest but it was offered on one of the wholesale sites that I found.


Below are a few of my favorite ideas that I found on Pintrest and other various blogs around the web.

Munster Rose Blog

I'm in love with the idea of gluing doilies over colored paper. If you are having a lace theme wedding then this  idea can be used for flower girls and snack holders as well as aisle decor. 
Once Wed
I found this gorgeous garland DIY on Once Wed. There you can find the template for the birds and a detailed description of how to make it. I think that this idea would also be great for holiday parties and any types of showers (baby or bridal).
Munster Rose Blog
This look is so easy. Just mason jars and various trims or yarn make this rustic but chic. Again the doilies on the tea lights add to the simple elegance of this style shoot.

Are you thinking of using Babies Breath for your wedding? what ideas or images do you have in mind for your dream day. Share with us on Facebook! How about you Like us while you're there!

Wednesday, September 26, 2012

Book Review: Adornments by Myra Callan

Image: Amazon 

Myra Callan, designer and creator of Etsy superstore Twigs & Honey has made a living off of beautiful things. If you have browsed any bridal or wedding blog and especially Pintrest then there is a good chance you have seen her work. And just as I was aksing myself "how do you hand make flowers?" My answer was given in the form of this extremely informative and exceptionally beautiful book. 
Twigs & Honey 

In Adornments you are given trade secrets by one of the handmade communities biggest stars. Everything from petal shaping to feather stripping is described in detail and illustrated by her gifted friend and photographer Elizabeth Messina.

The book, however, is not for the novice crafter. I would recommend this book for an individual with intermediate to advanced skills. Some tools and supplies, such as a millinery iron and various clips and headbands, should be purchased before approaching any project.

Because I am a big fan of Myra Callan and her growing empire I am very excited and happy to have preordered this book. It is of course available on both Amazon and Barnes & Nobles websites at this time. When you get a chance check it out and make something pretty for me! 

Tuesday, September 18, 2012

How To: Dye Feathers


Dried by Morning
I've had this idea in my head for an ombre feather piece for a while. I could not,however, find the right color and look on any feather vendor's sites. So I looked it up on YouTube and thanks to the high demand for feather extensions there were a few DIY tutorials.

What you'll need:
Rit dye
Distilled white vinegar
Feathers (dont have to be white, but should be clean)
pot
bowl of plain cool water
Papertowels

How to:
• I used Rit's fushia color (i didn't have the patience to order the Jaquard acid dye that was recommended for feathers. Fly Dye was also one mentioned but I have yet to find a link for this)
• I brought a small pot with one part vinegar and one part water to a rolling boil then added a table spoon of dye to the water and stirred for 10 seconds and turned down the heat.
• I also had a container of plain cool water beside to stove for rinsing.
• With a gloved hand I dipped or dropped the feather into the dye and stirred for upto 15 seconds or less . It really depended on how dark I wanted it.
• I fished out the feather with a plastic fork and dropped it into the water to rinse. If it was too light I would dip it back in the pot of dye.
• Not sure if it helped but I would carefully take the feather out of the rinse by its quill so as to keep the plume smooth.
Wet Feathers
• I then laid them smoothly on a paper towel to dry and when I was done dyeing all of them I took another towel and pressed it on top to make sure they were not drenched.
• After 15 minutes I rubbed apart some of the plumage with my thumb and middle finger to make sure they dried all the way through and smooth.

What I learned: that there are dyes specially for animal product (i.e. Wool, feathers, silk) and there are dyes for plant product (i.e. Cotton). Rit dye is available almost everywhere and it mentions everything from silks to nylon.  I personally found that the colors were pretty vibrant and easy to control. So I will be using it again in the future. There were a few variations of techniques the ranged from very professional to just for crafts which I list below. Like Goldylocks I found a technique that was just right for me.

Here are the videos I watched on YouTube:
I basically used this technique the most : EscapeNormal
This was interesting but she used food color: SherryWolfe
And this one gave me ideas for drying larger feathers and showed me how resilient feathers can be: BlueWhaleArts

Let me know how yours come out. Send me a photo or let me know what techniques you use.
Published with Blogger-droid v1.6.8

Friday, September 14, 2012

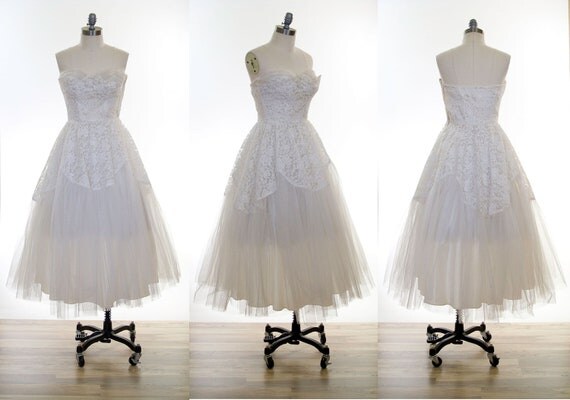
Money Saving Tips For Your Wedding Dress


Raise your hand if you know the difference between Swarovski crystals and regular rhinestones. Raise your hand if you can eyeball a picture and tell the difference between inexpensive satin and higher end satin. Still no hands? Ok, how about this, raise your hand if you know what your paying for when you buy a custom made wedding dress.

When planning a wedding there are so many things to consider and the wedding dress is one of the most important factors. But lets look at what's really important when considering the dress. This is the one time in your life that you get to go all out and feel like royalty so its understandable that you would like to spare no expense, but you will only wear this dress once. It will however, live forever in pictures so you do want to take into consideration style and presentation, but that doesn't mean you have to spend thousands of dollars.

When your paying for a dress you are paying for essentially parts and labor, just like your plumber or mechanic (keep in mind an Italian or french worker will be paid more than a Chinese worker). You are then charged wholesale markup so that the dress company makes profit, and the store's markup so that they can also make profit. Before you walk into a boutique there are a few questions you need to ask yourself:
 What is more important, dazzle or fit? How much beading do you really need? More times then not less is more when it comes to wedding dress fashion.
Here are some tips to saving a lot of money on your wedding dress

  • find a fashion school near you and ask them to help you find a student who can do bead work and/or tailoring for you. 
  • ask if they have your dress or a similar dress in a less expensive fabrication. A man made satin can look just as good as one made of silk.
  • See if your favorite designer has a lower-end line. Often times designers have a line that is much lower in price with the same body and design concept.
  • Look up sites that sell vintage dresses, hand made dresses and used dresses for a fraction of the price: Etsy, Preownedweddingdresses.com, Craig's List and Ebay. Note: be careful with Ebay. be sure that the seller shows pictures of the actual dress and tags not just the magazine photo.
With any website try to get one size up as apposed to the size you would like to be on your wedding day. There are no guarantees that you will hit your goal weight and a dress too large can always be taken in. 

Just keep in mind that you looking good an a perfectly fitting dress with a glowing face will be a much better topic of conversation than your overpaying for a designer name.

New Blog Fridays: Oh So Lovely Blog

Just found this great blog: Ohsolovelyblog.blogspot.com . Brainchild of Kansas City graphic designer and freelance photographer Audrey, this great blog features beautiful DIY's and gorgeous FREE printable tags and menu cards.


 Also checkout her business website Ohsolovelycreative if you live in the KC metro area.

Friday, September 7, 2012

Professional Hair Color @ Home

Last night while surfing the web I found this great site called eSalon.com . The site has real colorists who create a custom salon quality semi-permanent or permanent hair color for you based on your individual apearance and desired hair color.The process is simple, you answer a quick survey that asks you questions concerning things like your skin tone, natural hair color and ethnicity. Then you tell them the color you desire which is shown on a model so you can get a good idea as to what it will look like. And in case you were skeptical (like me) that you are actually getting a real live human to process your order, you can upload up to 5 pictures of yourself and even add specific details to your request about your lifestyle and concerns.
"Many clients incorrectly identify their natural or current color- people tend to think their hair is darker than it actually is," says Kim, an eSalon colorist.

the best part about this online service is that you can get it for just under $25 including shipping. But if you click here, you can try a free trial and only pay $4.95 for standard shipping or $6.94 for express shipping. Just remember to give yourself 4weeks before the big day to try any new color. This will give your stylist a healthy amount of time to correct any mistakes you may make and all coloring to settle.

Tuesday, August 21, 2012

Welcome to Beyond a Veil Brides. I'm pretty sure that by now you have heard a million times that the average cost of a wedding is well over $20,000. Well BAVB is a place for fashion forward brides to find budget saving tips, tricks and inspiration. Stop by weekly for fresh ideas, beautiful images and stories from real brides.